Do “All Tiny Homes Go Moldy”?
Lately, I’ve been hearing a lot of horror stories about mold and moisture in tiny homes. In some cases these issues are not detected until they have already devastated the structure. A moisture problem gone unnoticed can result in tens of thousands of dollars in repairs (not to mention serious health issues) – or even render the home a total loss. That’s someone’s tiny living dream turned into a nightmare.
A Widespread and Underreported Issue
Sadly, this seems to be a growing problem in the tiny home community — one that affects not just inexperienced DIYers, but also well-known commercial builders and even tiny homes featured on popular TV shows.
I suspect that many homeowners and builders are confused about what’s happening, what caused it, and may be too embarrassed or devastated to speak up. After all, mold and rot don’t exactly fit the simple and carefree image of tiny living many drawn to this lifestyle have been sold and come to expect.
A Story That Disappeared
Case in point: a popular builder was recently called out in a YouTube video by a devastated homeowner who discovered rot, mold, and rust had destroyed their floor and trailer. The video quickly gained thousands of views — but just a few days later, it was gone. Presumably, the builder agreed to reimburse the customer in exchange for taking it down. While I am happy the homeowner got some justice, hiding these issues isn’t going to help others build better moving forward.
Why I’m Writing This
As a DIY tiny house owner-builder living year-round in a cold climate (Zone 5), I have firsthand experience that builders who do not live in the tiny homes they build may lack. I’ve learned what works — and what doesn’t. I’ve lived successfully in my tiny home for five years now, even surviving a weekend with temperatures as low as -15°F without serious mold or moisture issues. That said, it hasn’t been without lessons, and I’ve learned that staying ahead of moisture requires constant vigilance.
I’m not a building scientist, but I do believe my personal experience offers a useful perspective on this issue. Regardless of what credentials their authors may or may not possess, many articles and videos about tiny home design are published before the homes are ever lived in — meaning those ideas haven’t been tested in the real world. Some of these untested methods can circulate for years and even become “best practice” before they are debunked by someone who tries them and finally admits it didn’t work. Meanwhile, the original content remains, collecting clicks and views.
What’s Causing The Problem?
Moisture issues in tiny homes can have a variety of sources – rainwater intrusion through incorrect flashing of roofing and siding, missing or improperly installed weather-resistant barrier (WRB), or poorly installed windows and doors. For purposes of this article, however, I’m going to focus on the one moisture issue that is most often misunderstood and most pernicious: condensation.
Condensation
Condensation may be the single most important issue at play in tiny home moisture issues – perhaps because it’s also the least intuitive for people to understand. It’s also the one moisture issue where tiny homes are more susceptible than larger homes (more on that later). Unfortunately, much of the advice about condensation on the web is either confusing and overly technical or just plain wrong. My goal in this article is to keep things simple, accurate, and practical, so that you can understand enough to avoid this issue in your own home.
What is Condensation?
The air around us always contains some amount of invisible water vapor. The amount of water vapor in the air at any time can be represented by a percentage value (0%-100%) known as relative humidity (RH).

When the relative humidity of the air reaches 100%, excess water vapor “condenses” into liquid water, in the form of small droplets suspended in the air. This is what happens when clouds form up in the atmosphere. It’s also what causes fog and dew to form at ground level.
The interesting thing is that warmer air can hold more water vapor than colder air. It’s called “relative humidity” because it’s relative to the air temperature. The temperature at which condensation will occur, given a fixed amount of water vapor in the air, is (appropriately) called the “dew point”.

Water vapor doesn’t only condense in the air itself — it also condenses on surfaces when those surfaces have a temperature below the dew point. This is why dew forms on the ground at night when the ground cools off faster than the moist surrounding air.
Another ubiquitous example of this phenomenon from daily life is the moisture that appears on the outside of a cold soda can on a warm day. The relative humidity outside may only be 50% given the air temperature, but if the temperature at the surface of the can is at or below the dew point, beads of water will form on the can when the air comes into contact with it.
What Causes Condensation in a House?
The same thing that causes condensation on the outside of a soda can can happen on the interior of your home on a cold day if the walls, floor, or ceiling hit the dew point. Put simply: condensation happens when inside surfaces get too cold, the indoor air is too humid, or both.
Let’s consider a simple example: A tiny house at 70°F and 50% relative humidity (a pretty typical indoor condition). At this temperature and humidity, condensation will begin to form on any surface that’s 50°F or colder — only 20 degrees below the air temperature. It doesn’t take much.
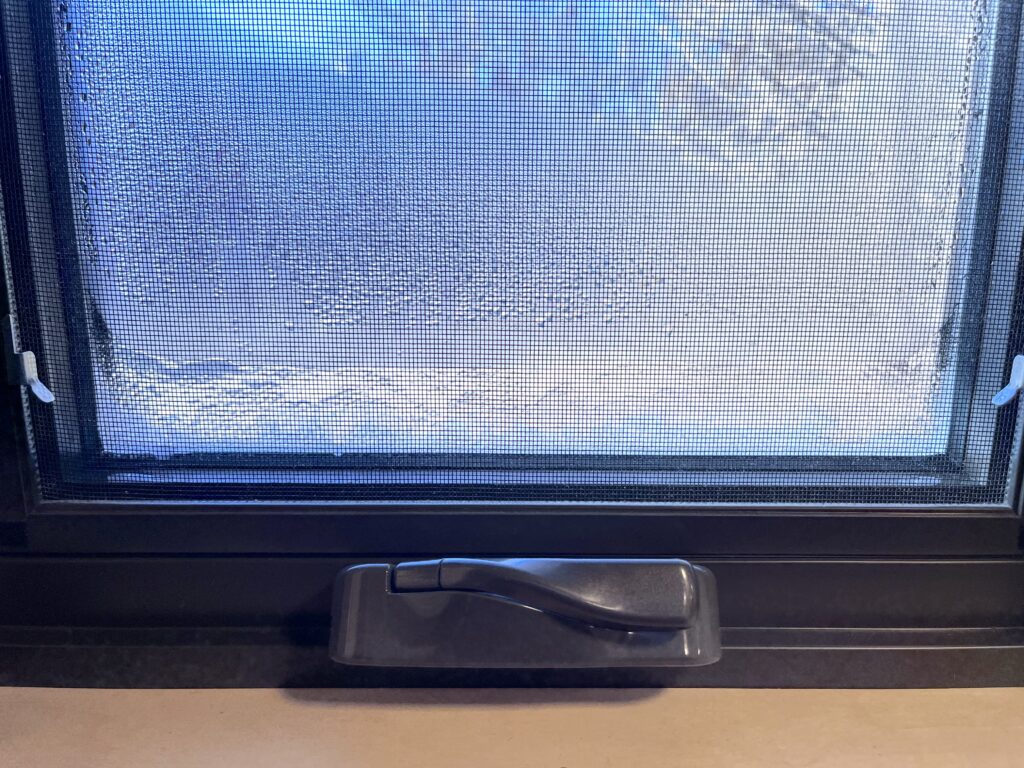
Condensation on a window in a tiny house.
A Thought Experiment
As a thought experiment, let’s picture a small tiny home on wheels with a perfectly air-sealed interior (nice work, builder!). Inside, it’s 70°F with 50% relative humidity. Outside, it’s 40°F.
If we allow the indoor air to cool without adding or removing any moisture, the relative humidity will rise as the temperature drops. Eventually, it will reach 100% when the air temperature hits the dew point of 50°F.
You might expect fog to form in the room – but before that can happen, the interior surfaces of the walls, floor, and ceiling will reach the dew point first. Condensation will begin forming there, pulling moisture out of the air (so fog never develops).
In most homes, condensation appears first around windows and doors, since they’re usually less insulated than the walls. It also tends to collect at the bottoms of windows, doors, and walls due to gravity, temperature gradients, and air movement (as warm air rises).
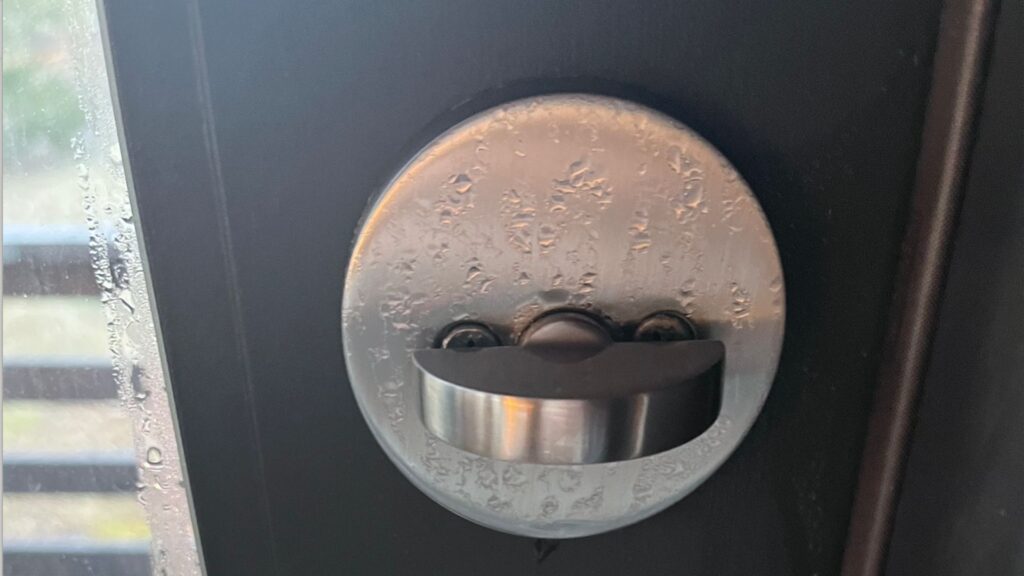
Condensation forming on interior door hardware on a sub-zero day.
If this happens on rare occasions, the surface should dry quickly with no permanent damage. However, if this happens regularly, the persistent dampness forms a perfect habitat for mold, mildew, and fungi to grow. These organisms feed on the organic materials in your wall board and framing, leading to rot and creating prime habitat for carpenter ants, termites, and other insects to take the damage even further.
R-Value
What causes cold floors, walls, or ceilings? This comes down to something known as the R-value of the assembly. Put simply, R-value is a material’s resistance to the transfer of heat through it. A higher R-value indicates greater insulating ability.
On a cold day, a material with a higher R-value will keep the interior wall surface warmer and the exterior wall surface colder. The air in the room will stay warmer longer because heat will travel through the wall more slowly.
Going back to our wet soda can example: R-value is the reason why an aluminum can “sweats” but a double-walled or insulated tumbler doesn’t. The R-value of the aluminum can is effectively zero, while the wall of the tumbler has enough R-value to keep the outer surface above the dew point.
How an assembly is constructed, sealed, and insulated all affect its overall R-value.
Thermal Bridges and Thermal Breaks
A material with very low to no R-value (like steel or aluminum) is sometimes called a thermal bridge because it easily transfers heat and cold from one surface to another, while a material with high R-value (like foam or mineral wool) is sometimes called a thermal break.
These terms are not absolute. Compared to a 2×4 piece of steel, a wood 2×4 is a thermal break. But as part of a wall assembly next to foam or mineral wool insulation, a wood 2×4 might better be thought of as a thermal bridge.
Heavy use of metal plates, ties, and hangers in assemblies can have unintended consequences by creating thermal bridging. The same is true for “overbuilding” — packing in too many 2x4s side by side can create a thermal weak point.
The Myth of the “Thermal Break”
Thermal break is a real concept – but there is no such thing as a universal “thermal break” in the absolute, generic sense that some people commonly use the term. There are simply different materials with different R-values.
If you want to prevent thermal bridging between a steel trailer frame and a subfloor, a piece of 1” XPS foam will provide a much better break than a piece of 1/4” XPS or Reflectix, while a strip of “sill seal” will compress down to nothing and provide no real benefit. These are not equivalent and referring to all of them as a “thermal break” can be misleading.
Capillary Breaks vs Thermal Breaks
Another common source of misunderstanding is the distinction between capillary breaks and thermal breaks. A capillary break is a waterproof flashing tape, gasket, or other barrier used to prevent moisture from transferring between two porous materials in contact, such as concrete and wood. Sill seal performs the role of a capillary break between a concrete foundation and a wood sill plate, where the goal is to prevent moisture absorbed by the cement from wicking into the wood and causing rot. In the case of a metal trailer chassis, however, we are concerned about condensation rather than capillary action. Metal is not porous, so a capillary break won’t help (if condensation is likely to occur on the metal, it will be just as likely to form on the flashing tape or on the wood itself). Only a thermal break can prevent condensation by raising the temperature of the surface above the dew point.
Condensation Inside Wall, Floor, and Roof Assemblies
If condensation does happen, you want it to happen where it’s visible and can be addressed. An even more insidious form of condensation can occur inside your walls, ceiling, or floor, which can easily go undetected until it’s too late. This is where air barriers and vapor retarders come into play.
Note that if your insulation is vapor-impermeable (e.g. closed-cell spray foam) or you have a sufficient layer of continuous insulation on the exterior of the assembly (like closed-cell foam board), a separate air barrier and vapor retarder is generally not necessary.
Air Infiltration
Condensation inside an assembly occurs when air-permeable or vapor-permeable insulation (mineral wool, sheep’s wool, fiberglass, or even open-cell spray foam) is used without a complete air barrier on either the interior or exterior of the assembly. The incomplete air barrier causes warm, humid interior air to be drawn into the wall cavity where it migrates through the insulation and condenses on any surface with a temperature below the dew point.
Ironically, older, leakier homes often avoided this issue because they were so leaky that the RH of the interior air stayed low enough to avoid the condensation, and any condensation that did form dried quickly. Basically, there’s a level of leakiness at which the assembly is okay and a level of tightness at which it’s okay, and an area in-between which is the trouble zone. So when we create air barriers in homes today, the goal is to be firmly in the “tight but controlled” zone, and not accidentally end up in the “semi-tight, condensation-prone” zone.
Air Barriers
Most condensation in cold-climate walls happens when warm, moist interior air leaks into the wall cavity. (In warm, humid climates with air conditioning, the reverse is true – exterior air can leak inward and condense on cooled interior surfaces.)
Gaps in your exterior sheathing can actually pull air from your interior into the wall/floor cavity, acting like a suction path for interior air.
Surprisingly, air leakage leakage doesn’t have to be stopped at both the exterior and interior surface to prevent air leakage into the wall cavity. If you can stop it at either one or the other with a carefully detailed air barrier system, you’ll have met the goal.
An air barrier doesn’t actually have to be a literal separate barrier (though it can be) — it can be plywood sheathing taped at every seam, or taped interior wall board (if every penetration and seam is carefully sealed).
Air barriers are covered in Section N1102.5 of the 2024 International Residential Code (IRC).
Vapor Retarders / Barriers
While air barriers stop the bulk movement of moist air, vapor retarders control how quickly water vapor diffuses through materials. Diffusion is a much slower process than air leakage, so once you have a solid air barrier, you’ve already solved most condensation issues inside your assembly.
In most modern assemblies with vapor-permeable insulation, the regular wall finish—such as painted drywall—acts as the vapor retarder required by code. Installing a separate plastic (polyethelene) vapor barrier is no longer recommended, since its permeability is so low that it can actually trap moisture and prevent the wall from drying out if it ever gets wet.
The best approach is to build a wall that can control vapor but also dry when needed. The exact vapor retarder class and placement depend on your climate zone and wall design. Section R702.7 of the 2024 IRC covers this.
Smart Vapor Retarders

I used Intello Plus in my tiny home as a smart vapor barrier
A newer class of “smart” vapor retarder products, such as Pro Clima Intello Plus and CertainTeed MemBrain, change permeability depending on humidity level. This allows trapped moisture to escape when needed while still slowing vapor diffusion under normal conditions. They can also double as your air barrier, making them a great choice for tiny homes with vapor-permeable insulation.
In short: focus on a continuous air barrier, use materials that can dry in at least one direction, and follow codes for vapor retarder requirements in your area.
Why Are Tiny Homes More at Risk of Condensation?
Any home can have condensation issues, but tiny homes are particularly susceptible for a few key reasons: high interior humidity, cold metal trailer frames, a large ratio of exterior surface area to interior volume, and cathedral ceilings.
1. The relative humidity tends to rise rapidly and stay high in a tiny home if not actively combated.
Showering, cooking, and simply breathing all increase the relative humidity of indoor air. In a larger home, there’s far more air available to absorb that water vapor, so humidity levels tend to stay relatively stable. In a tiny home, however, humidity can build up quickly – especially with multiple occupants – and become a constant battle.
For perspective, I grew up in a 1,500 sq ft home built in the 1950s. It has old-fashioned wood plank sheathing with gaps between the boards and plenty of air leaks around the doors and windows. During the winter, the interior relative humidity regularly sits in the 10%-20% range. Compare that to my tiny home, where my RH regularly climbs above 60% and I struggle to get it down to 50%, even with two windows cracked open at all times.
The higher the relative humidity climbs in a home, the harder it becomes to avoid condensation–even with plenty of insulation and proper air sealing.
The Solution
Monitor your indoor humidity with a hygrometer and aim to keep it between 30-50% during the winter.
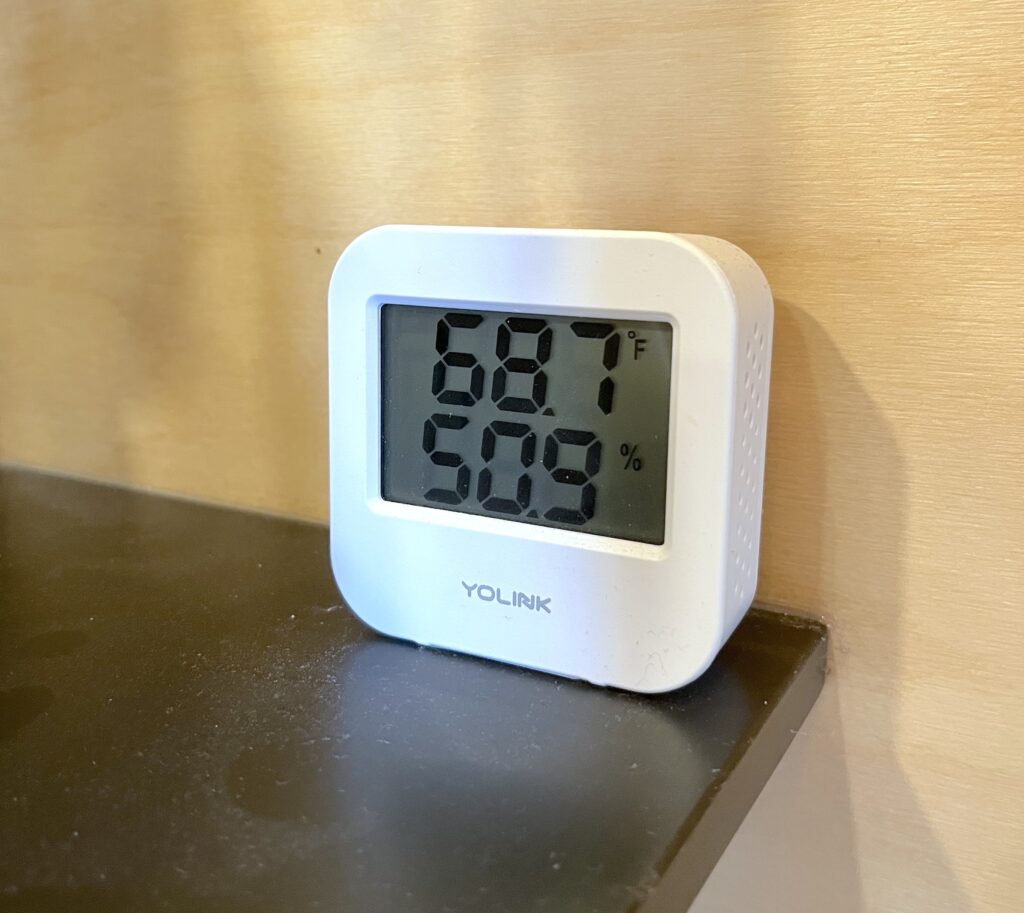
Use a hygrometer to monitor your tiny home’s relative humidity at all times.
Operable Windows & Exhaust Fans
Controlling humidity levels usually means introducing fresh air into the home through ventilation. Because the outdoor air is colder than the interior air in the winter, its capacity to hold moisture is very limited in comparison. This means that even if the relative humidity outdoors is high, the absolute humidity of the outdoor air (the actual amount of water vapor) is always lower than the air inside. This is why opening windows and running exhaust fans quickly reduces indoor humidity.
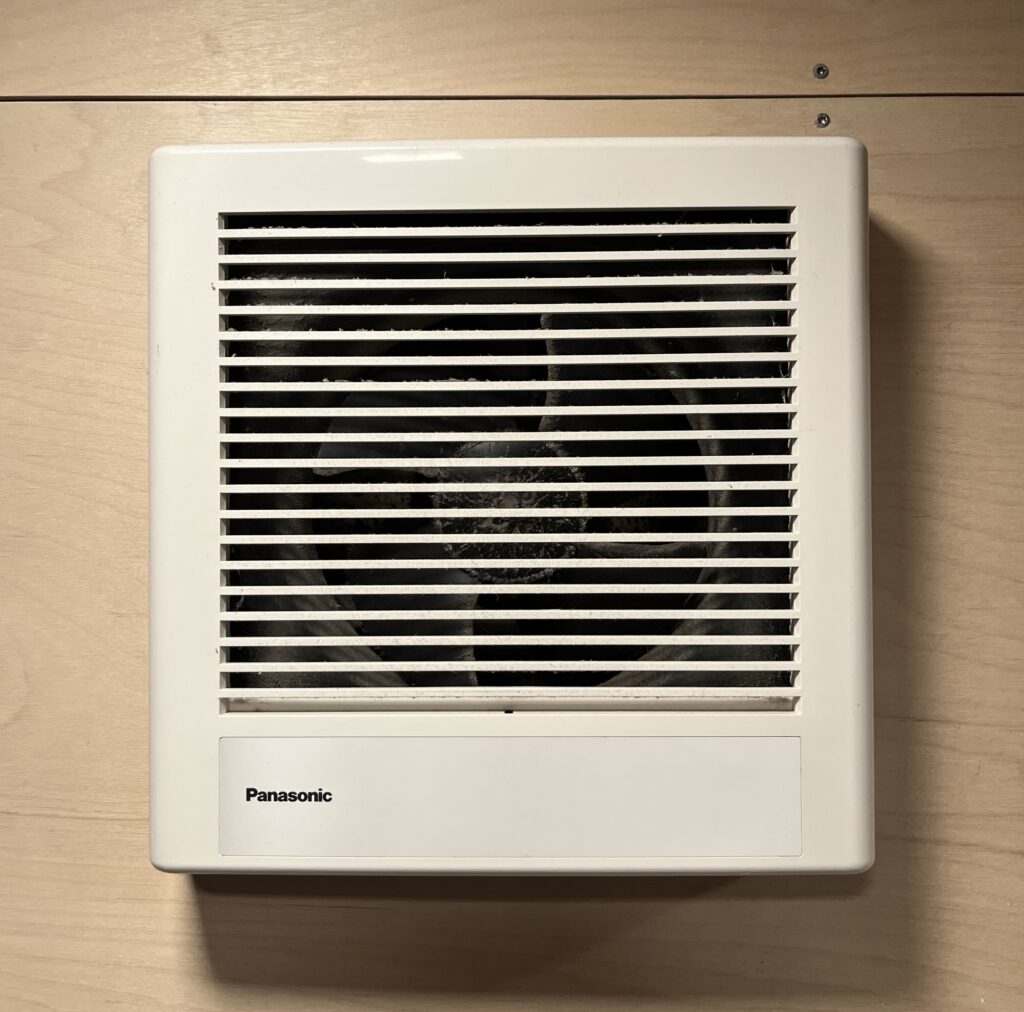
Panasonic Whisper Quiet exhaust fan
Every tiny home should have a vented range hood or exhaust fan in the kitchen (to use while cooking), as well as an exhaust fan in the bathroom (to run during and after showers). Quiet options are available which can also serve to actively ventilate the home whenever the humidity levels rise.
Keep in mind that if you run an exhaust fan, it won’t do much without a source of makeup air, so be sure to open a window or include another form of passive makeup air in your build. A sliding window or a small awning window on the opposite end of the home from the exhaust fan is ideal for this purpose because it can be left cracked open without risk of rain intrusion or too much heat loss.
Heat Recovery Ventilators (HRVs)
A heat recovery ventilator (HRV) is a mechanical ventilation system that exchanges stale indoor air with fresh outdoor air while transferring heat between the two airstreams to improve energy efficiency.
An HRV is a great idea for a tiny home because it will actively ventilate the space while preserving some of the heat that would normally get lost in the process. This helps make all of your careful air sealing and insulation work pay off.
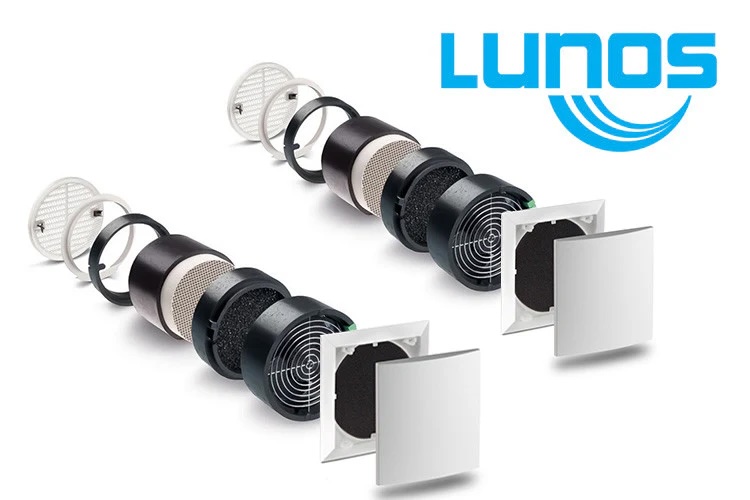
The Lunos ductless HRV system is one popular option for tiny house ventilation.
CEO Jerry Terry With Decathlon Tiny Homes Discusses Lunos e2 Air
Dehumidifiers
Finally, mechanical dehumidifiers can remove excess moisture from the air with no heat loss by deliberately condensing it into a reservoir inside the unit. These come in all different shapes and sizes, but you will probably need a fairly sizable one to make a measurable difference in a tiny home, and finding space for a larger unit can be challenging. They also consume considerably more electricity than exhaust fans or HRVs, and can be a bit noisy.
Keep in mind that even with a dehumidifier, some degree of ventilation will still be required to maintain healthy indoor air quality.
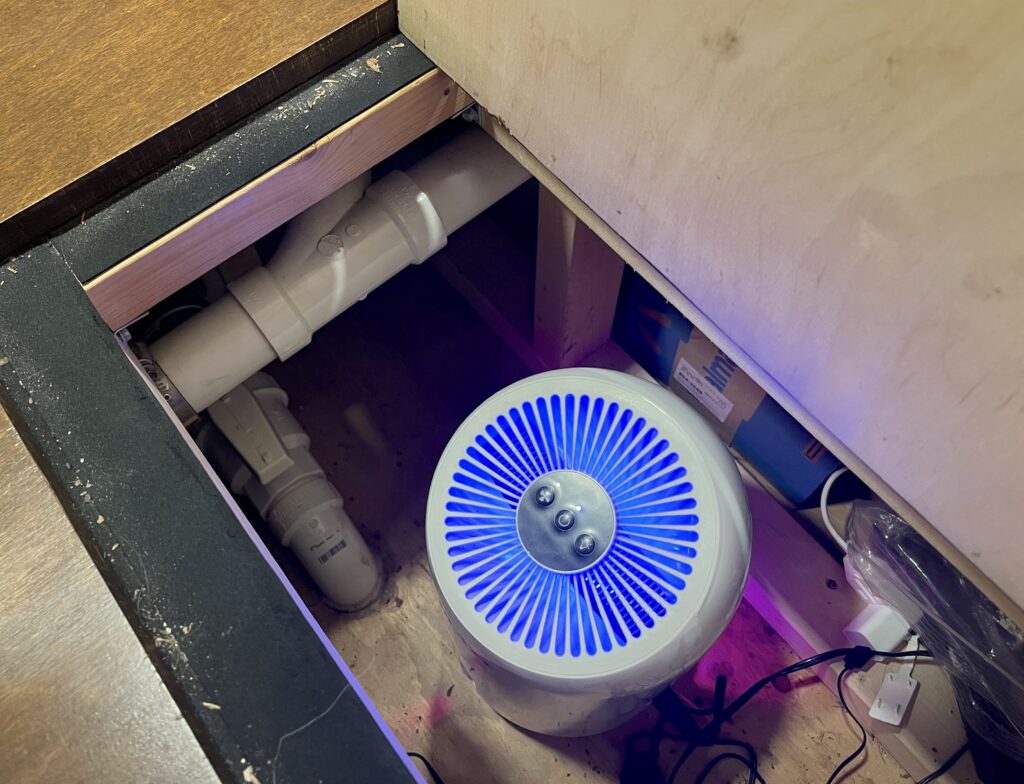
A small dehumidifier helps keep the space under the raised floor in my tiny home dry in the wintertime.
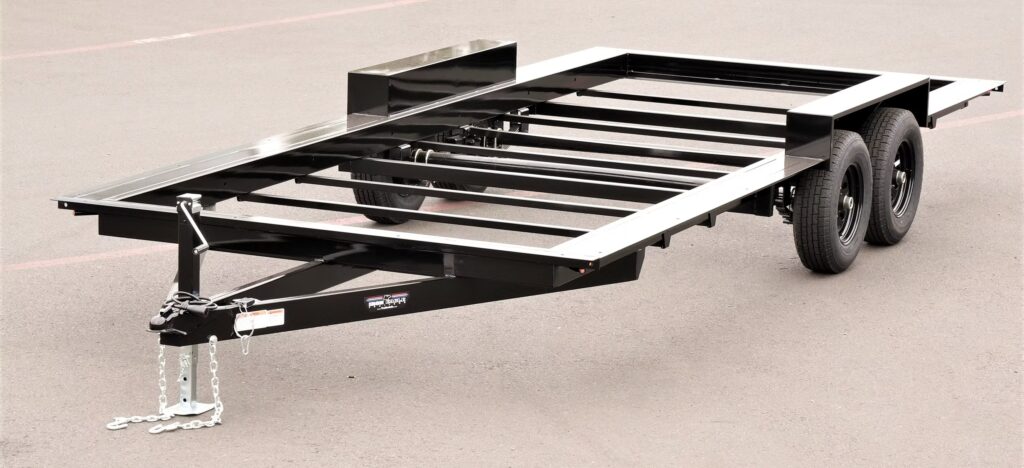
2. Tiny homes are built on metal trailers.
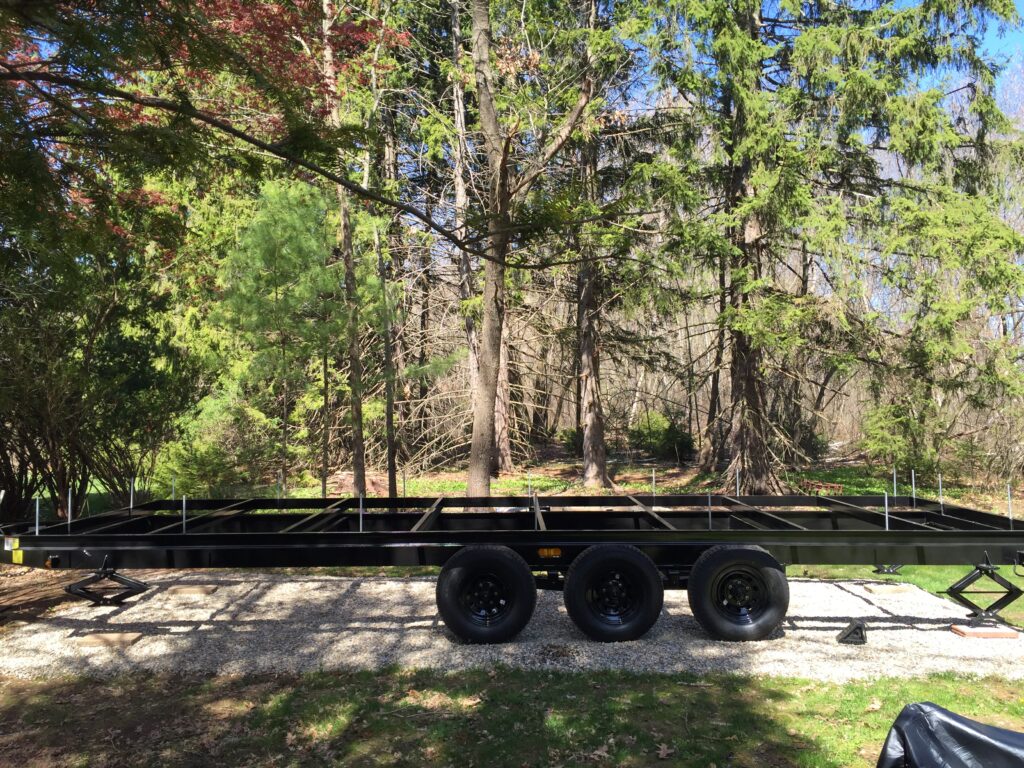
My 24’ tiny house trailer, custom built by Wright Trailers
Unlike wood–or even concrete–metal is an almost perfect thermal conductor, offering virtually no R-value. While manufactured homes, ANSI 119.5 Park Model RVs, and the first Tumbleweed tiny homes were built with an above-deck wood floor assembly on top of the metal trailer frame, many tiny home builders soon began finding ways to integrate their floor assemblies into the trailer frame and use the trailer crossmembers as their floor joists in order to provide more headroom in their lofts.
The 13’-6” DOT height limit is the limiting design constraint here: the thicker your floor assembly is, the less headroom you have to work with inside.
Unfortunately, embedding the floor structure in the trailer frame often means that all or part of the subfloor sheathing is in direct contact with metal framing—a perfect recipe for interior condensation. The metal trailer framing acts as a thermal bridge, transferring the cold of the outdoor air directly to the interior surface of the subfloor sheathing. In fact, metal is such a powerful thermal conductor that cold metal will pull heat out of the wood faster than cold air would by itself. Even if the cavity between every crossmember is filled with a high R-value insulation, the effective R-value of the assembly is significantly diminished by the metal framing.
Further problems arise when the floor assembly isn’t fully air sealed. Any warm indoor air that leaks into the floor cavity will immediately condense on the cold metal framing and floor pan, soaking the entire assembly and leading to rust and wood rot. Because condensation naturally tends to form in the lowest, coldest areas, the trailer becomes one of the most vulnerable parts of a tiny home.
The Solution
Build an Above-Deck Floor Assembly
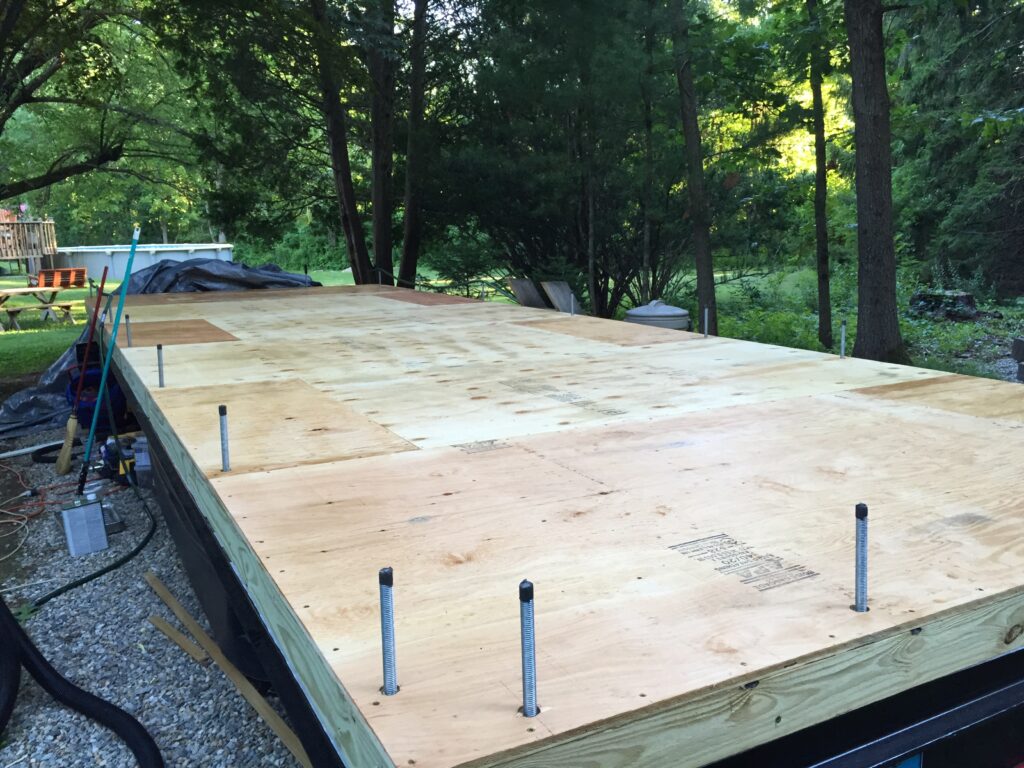
The above-deck floor assembly on my single-story tiny home keeps my floor warm and free of condensation.
If you can spare the headroom, frame an above-deck floor assembly (2×4 minimum) on top of your trailer frame, and make sure it’s both insulated and air-sealed. Try to preserve as much headroom as possible by optimizing the design of the trailer chassis—for example, by using smaller wheels, drop axles, or recessed crossmembers placed below the main beams or between wheels—rather than by sacrificing insulation.
Floor joists on an above-deck floor assembly can also be run perpendicular to trailer crossmembers, reducing thermal bridging between the metal and wood framing. Note, however, that the problem we’re dealing with here is not actually with metal-to-wood contact, but rather the lack of sufficient R-value—whether provided by wood, foam, or another insulating material—between the metal and the interior surface.
Include Thermal Breaks Between Metal Framing and Subfloor Sheathing
Iron Eagle PAD Tiny Home Trailer
The Iron Eagle PAD is one example of a creative trailer design that works well in this scenario. Its crossmembers are recessed below the main rails (instead of flush or above them) in order to accommodate 2×6 wood framing dropped into the trailer cavity. This means the subfloor sheathing can be fastened directly to wood framing throughout most of the floor diaphragm rather than to steel crossmembers. Along the raised perimeter flange—where the walls sit—rigid foam can be added to create a thermal break between the metal flange and the sheathing/bottom plate. Bolts tie the whole assembly together.
Install Continuous Exterior Insulation
Continuous exterior insulation (rigid insulation board) attached to the underside and exterior perimeter of the trailer framing is another option to preserve interior headroom without sacrificing thermal performance. By encapsulating the entire frame, the steel itself stays warmer, reducing the risk of condensation inside the assembly and also improving the performance of the insulation between your floor joists.
SIPs
A site-built Structural Insulated Panel (SIP) may be another effective option to get below the 3½-inch height of a full 2×4 above-deck floor frame. SIPs are a “sandwich” of two layers of plywood or OSB glued to a layer of rigid foam, with wood blocking at the seams of each panel. The trailer cavity below the SIP can then be filled with additional insulation of your choice.
Air Seal the Floor Assembly
Floor assemblies should be fully air sealed. Floor pans should be taped at all seams and should not include drain holes. The instinct that some builders have—to add drainage holes “just in case”—actually breaks the air barrier and encourages migration of interior air into the floor assembly. In warmer climates, these holes will provide a pathway for humid outdoor air (and insects) to enter the assembly and condense on the underside of the subfloor sheathing if the interior is conditioned to a low enough temperature.
Skirt The House
Unlike manufactured homes, Tiny homes are often left un-skirted, leaving the trailer and floor assembly fully exposed to the cold outdoor air. One way to help prevent interior condensation—which can also be used to mitigate an existing cold floor—is to add an insulated skirt around the tiny home or otherwise fully encapsulate the trailer frame with insulation.
Skirting introduces new considerations, however, such as ensuring a moisture barrier between the ground and the underside of the home, and providing adequate ventilation of the enclosed space to prevent moisture buildup.
3. Tiny homes have lots of exterior surfaces and corners.
Almost every surface in a tiny house is an exterior surface—the roof, the floor, and almost every wall can have cold outdoor air on the other side of it. Corners, especially where the floor meets two exterior walls, are particularly prone to condensation. These intersections bring three cold planes together, often backed by solid wood framing that conducts heat outward.
Tiny homes also tend to have a lot of built-ins, cabinets, and closets on exterior walls. As air gets trapped inside these confined spaces, it cools, raising the relative humidity and increasing the likelihood of condensation. Pillows, couches, and mattresses pressed up against exterior walls have the same effect as they act like giant insulators, keeping the wall surface colder than the surrounding room air and pushing it closer to the dew point.
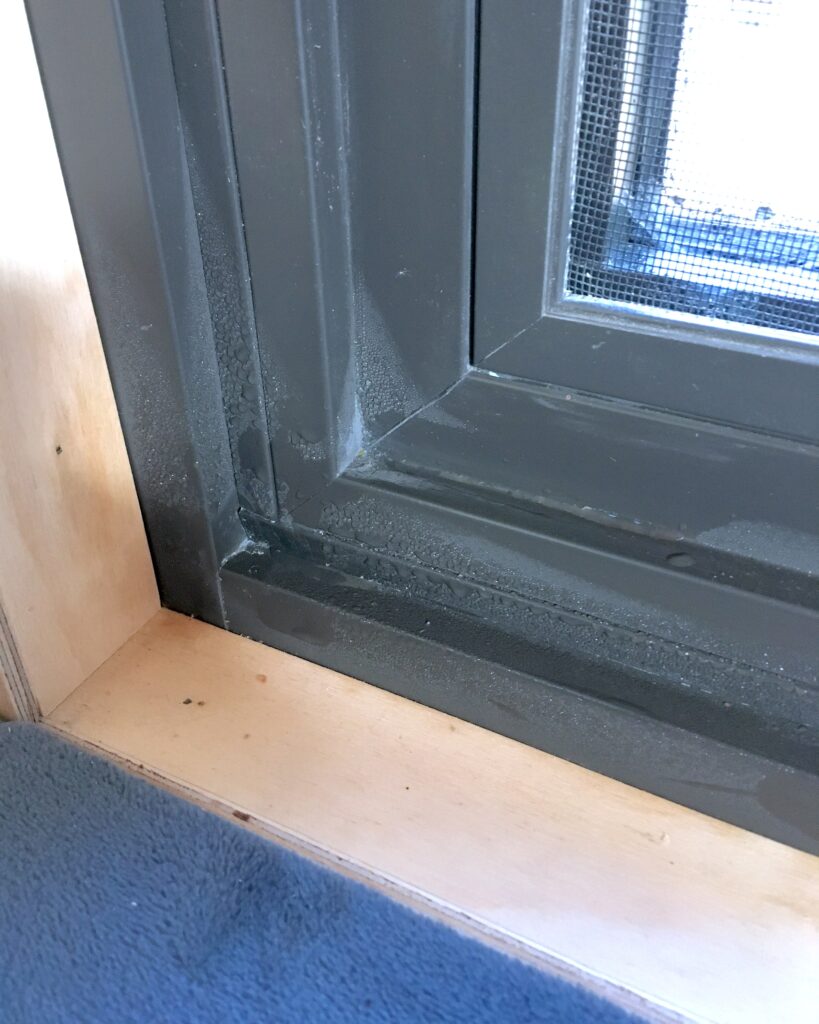
Condensation collects near the bottom of a window sill on a very cold day in my tiny home. A combination of glass, dense wooden framing, metal hardware in the wall assembly, and the insulating effect of a pillow leaned against the wall makes this a trouble spot.
The Solution
Condensation in these tight corners and enclosed spaces can be minimized through good airflow, thoughtful insulation, and smart furniture placement.
Keep Air Moving in Confined Spaces
Encourage air circulation with fans and ventilation openings wherever air might get trapped. Avoid placing insulating materials like mattresses or large cushions directly against exterior walls. When that’s unavoidable, inspect those spots regularly for early signs of condensation or mold.
Vent Cabinets and Built-ins
When designing built-ins or storage against exterior walls, include passive ventilation. Small openings, routed slots, or drilled holes at both the top and bottom of the cabinet encourage convection, letting warmer air flow through naturally.
Add Fans In Problem Areas
If passive airflow isn’t enough (or isn’t possible), a small computer case fan (2–5″) can work wonders. These fans are usually powered by a USB connection and use very little power. Aim it at the trouble spot or place it so that it circulates air through the space. The constant movement of air across the surface of the wall will promote evaporation and create an environment that is much less hospitable to mold.
Add Extra Insulation in Confined Spaces
Adding an additional layer of rigid foam insulation against the exterior wall inside cabinets and built-ins may lower the dew point enough to prevent condensation. Be sure the wall assembly can still dry to one side to avoid trapping moisture.
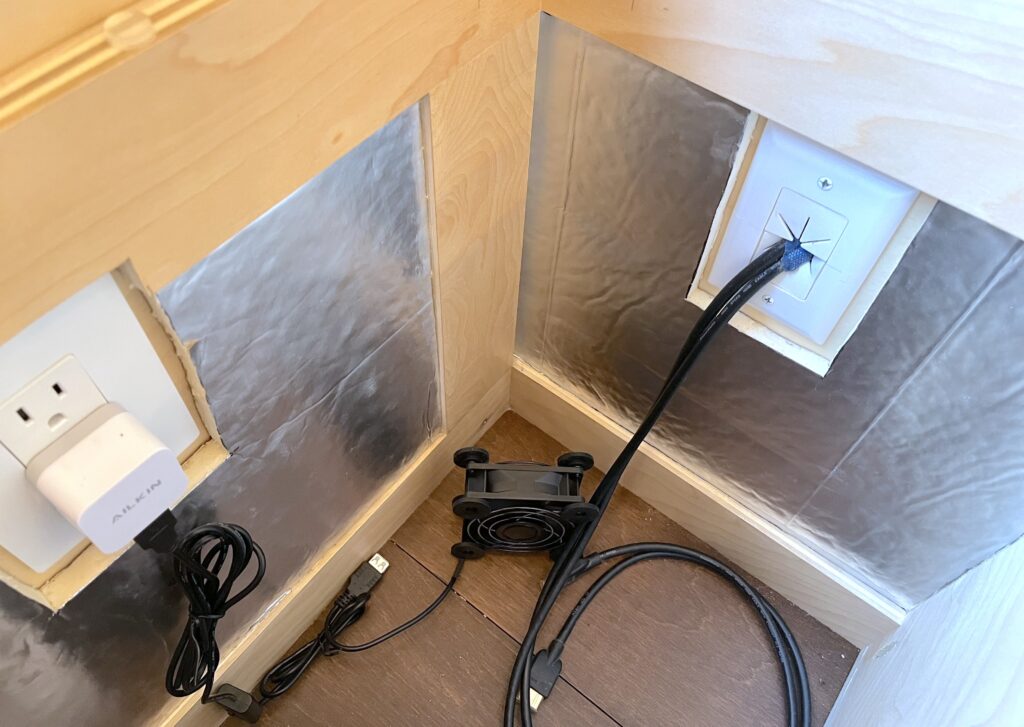
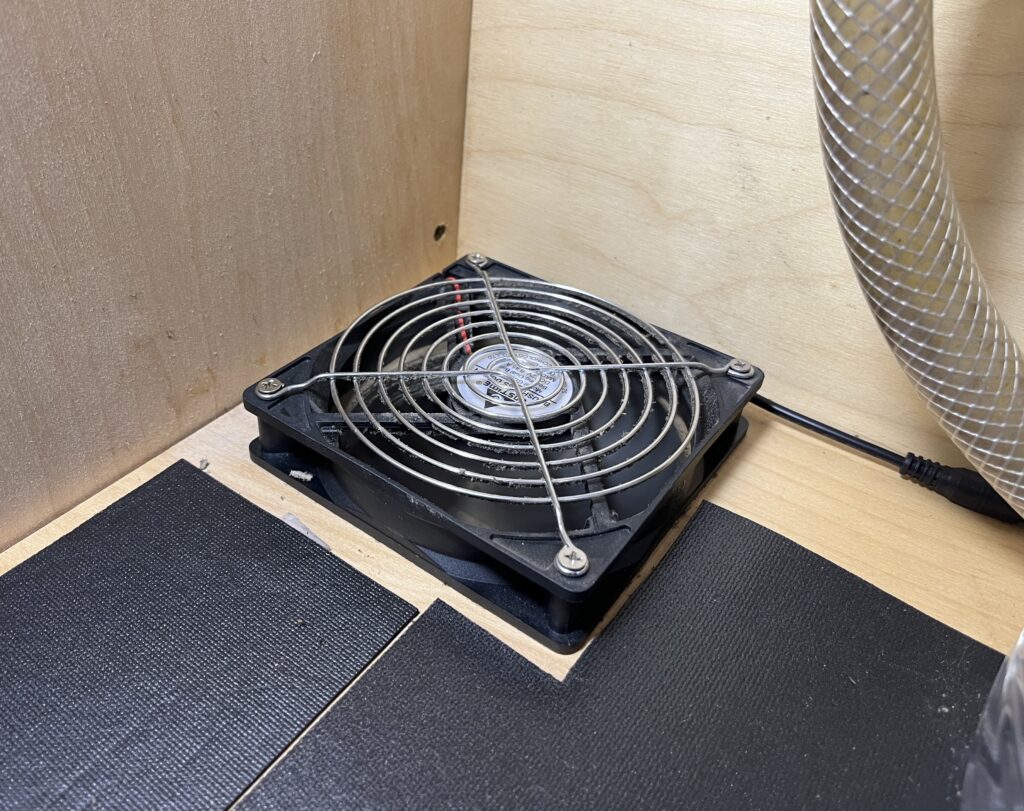
A small computer chassis fan pointed at the back corner of a built-in resolved another trouble spot in my tiny home. A layer of ½” rigid foam further mitigates the possibility of condensation.
Circulate Air Throughout the Home
My own tiny home features a raised floor that covers half of the floor plan. It hides my roll-out bed during the day, provides an insulated space for plumbing and utilities, and gives me lots of extra storage under the floor. Unfortunately, it’s also a problem spot for condensation because heat rises and floors tend to stay cold. The solution in my tiny home was to install a large 5” PC fan in the base of my bathroom vanity. This actively pulls air up from under the floor and exhausts it into the bathroom, while warm air from the living area (where the fireplace is) is drawn down through the opposite end. This steady circulation keeps both the underfloor area and the vanity cabinet dry and mold-free.
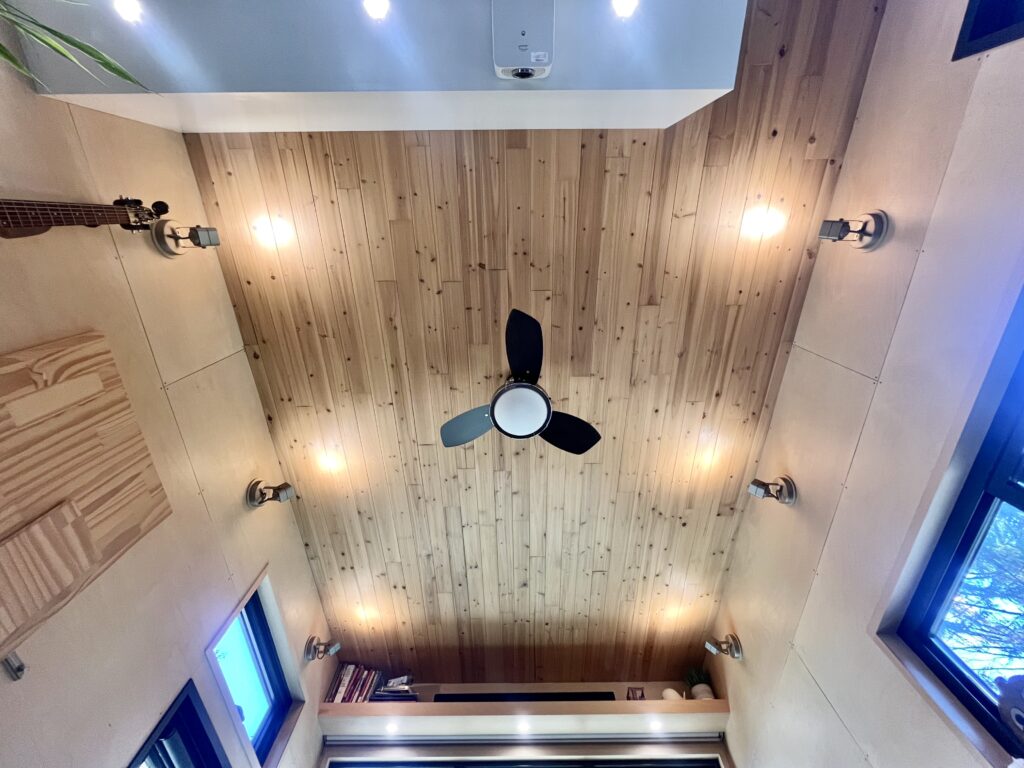
Use a Ceiling Fan to Distribute Heat Evenly
Ceiling fans can also help to evenly distribute the heat generated from your heat source throughout your home. During the wintertime, ceiling fans can be run at slow speed in reverse so that they have less of a direct cooling effect on the skin, while still generating airflow.
4. Tiny homes have cathedral ceilings instead of vented attics.
Roof assemblies are especially vulnerable to condensation. In a typical home, a vented and unconditioned attic space above the insulated ceiling prevents warm, moist air from reaching the roof sheathing and condensing on it. In contrast, tiny home roof assemblies are essentially “cathedral ceilings” or “hot roofs”, where the ceiling and roof assemblies are one and the same. Cathedral ceilings are notoriously susceptible to moisture problems in homes of any size.
The Solution
While a full technical breakdown is beyond the scope of this article, here are the main roof assembly strategies that can help you design a condensation-resistant structure.
Vented Gable Roofs
Gable roofs with sufficient slope and rafter depth can be vented above the insulation layer and below the sheathing at the ridge and eaves of each rafter bay. Keep in mind that venting the rafter bays reduces available insulation space by at least an inch, so rafters have to be sized accordingly. Details for this type of assembly are covered in Section R806.1 of the 2024 IRC.
Tiny homes with flat roofs or low-slope shed roofs, however, are difficult or impossible to vent effectively. In these cases, unvented roof assemblies are the only viable option.
Unvented Roof Assemblies
The standard unvented approach is to fill rafter cavities with closed-cell spray foam, which provides insulation, air sealing, and vapor control all in one. For those avoiding spray foam due to cost or off-gassing concerns, an alternative is to install a continuous layer of vapor-closed rigid insulation board above the rafters, with batt insulation in the rafter cavities below. The details of this assembly and the thickness of rigid insulation required are covered in Section R806.5 of the 2024 IRC.
Unvented Roof Assemblies with a Smart Vapor Retarder
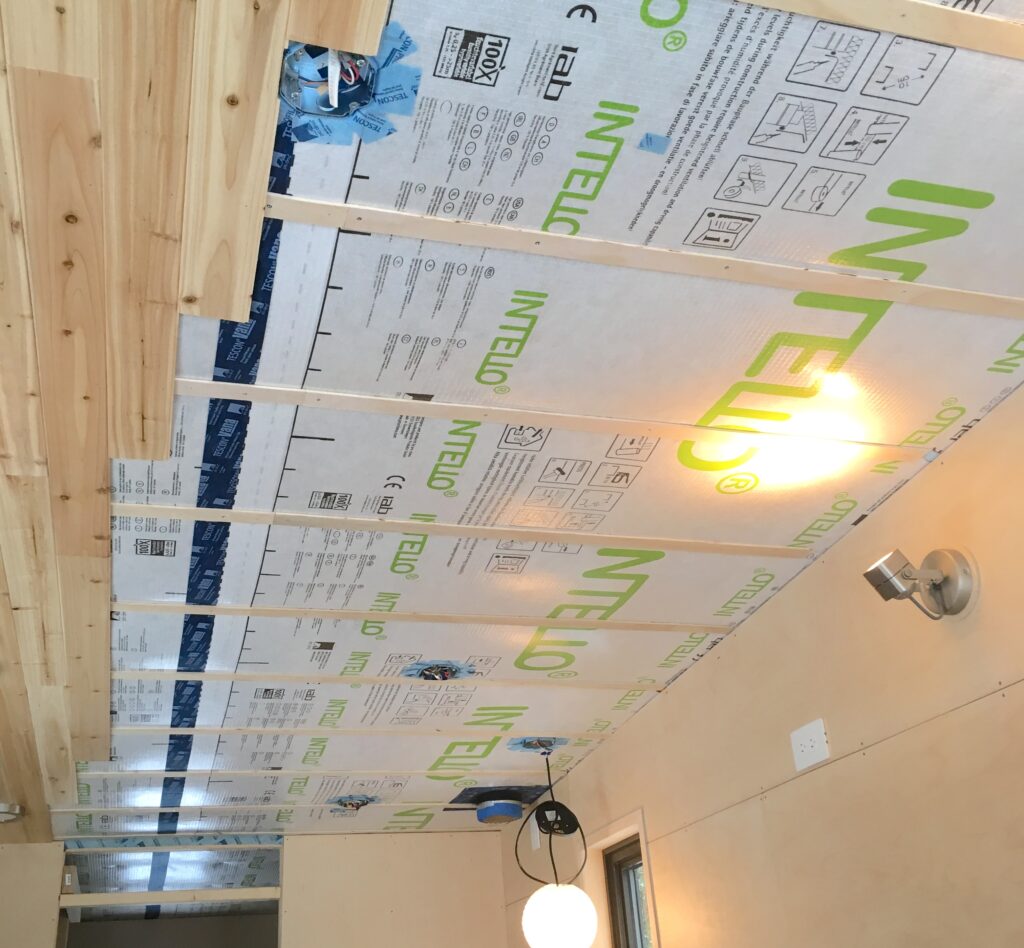
Finally, there is the somewhat more “experimental” smart vapor barrier assembly. This is when you fill your unvented rafter cavities with batt insulation and install a smart vapor retarder like Intello Plus or MemBrain behind the interior finish surface of the ceiling. The smart vapor retarder must be detailed with extreme care to avoid air infiltration (again, the goal is to avoid moist air reaching cold sheathing and framing members), but the “smart” behavior of the barrier allows the assembly to dry out if necessary. This is the route that I took in my own tiny home in climate zone 5 (So far, so good!).
A smart vapor retarder can also be used in conjunction with standard vented gable roofs or unvented rigid insulation assemblies for further assurance, especially when using leaky (air-permeable) ceiling finishes like tongue-and-groove planks.
Let's recap the 5 primary ways to control condensation in a tiny home:
- Increase insulation. If the wall, ceiling, or floor lacks enough insulation to keep the interior surface at a temperature above the dew point, it will get wet, no matter what. The type of insulation, wall thickness, and framing technique all play a role in the overall R-value of the wall and whether you will have cold spots. This is especially important to consider when designing your floor assembly, as steel framing on a trailer chassis can create thermal bridging to your subfloor. Along with insulation, proper attention must be paid to air sealing and vapor management to prevent condensation inside of assemblies.
- Introduce fresh, dry air. Because outdoor air is colder than indoor air in the winter, its capacity to hold moisture is much lower. This means that opening windows and running exhaust fans will quickly reduce interior humidity. Keep in mind that exhaust fans won’t work effectively without a source of makeup air, so be sure to include strategically placed operable windows or another form of passive air inlet in your build.
A heat recovery ventilator (HRV) can automate this process while preserving much of the heat that would otherwise be lost during ventilation.
- Raise the air temperature. All else remaining equal, increasing the ambient air temperature will reduce the relative humidity and will warm up surfaces prone to condensation. It may seem counterintuitive, but if you lower your thermostat when you leave for the day, you’ll actually be raising the likelihood of condensation as the temperature drops (so be sure to ventilate too!). If condensation is only forming in isolated areas (cabinets, closets, etc.), getting heat into these places becomes a priority, which also ties into the next point…
- Increase air flow. Moving air promotes evaporation and prevents condensation from forming in the first place. It also helps distribute heat evenly throughout the home.
Use fans and passive ventilation channels inside cabinets, built-ins, and other confined spaces to keep air circulating and prevent cold, stagnant pockets of air from developing.
- Use mechanical dehumidification. Dehumidifiers can actively pull moisture from the air by condensing it into a reservoir inside the unit. Dehumidifiers can be large and noisy and they do consume electricity, but they have the benefit of reducing humidity without heat loss.
Conclusion
A tiny home, like any home, needs to be built for the particular climate it will reside in. Typically, building to a colder climate will result in a structure that also performs well in a warmer climate, but the reverse is not true. Cold climate homes require special attention to insulation, air sealing, ventilation, and thermal bridging to avoid condensation.
Tiny homes are particularly susceptible to condensation issues because of high interior humidity levels, cold steel chassis, extensive exterior surface area, and cathedral ceilings. Because of this, DIYers and builders have to be even more aware of the pathways through which condensation can occur and actively educate themselves on how to mitigate these issues.
Even with careful design and planning, some issues may still arise. That’s why hands-on experience living in a tiny home is invaluable for any builder—it reveals the subtle ways heat and moisture behave in small spaces. When moisture problems do occur, close collaboration between builder and homeowner is essential. A healthy, dry, and long-lasting tiny home shouldn’t be a luxury—it should be non-negotiable.
About The Author Mike Spooner

Mike Spooner is a DIY tiny home designer, builder, dweller, and enthusiast. He began building ProcessHouse, his own tiny home on wheels, in 2016 and completed it in 2020, followed by a Prius camper build-out two years later. He serves as a member of the ASTM E06.26 tiny home subcommittee and as an interested party on the ICC/THIA 1215 tiny house standard.
Teaspoondwellings.com
Instagram
You Tube
TikTok
He writes at teaspoondwellings.com where he shares details of his builds, construction tips, and low-tech innovations in eco-sanitation and simple living—ideas that aim to bring us into better alignment with our environment and ourselves.
Mike, this is very informative. Thanks for the education. Will be looking at an air exchange system for the cabin. Brilliant explanation of the causes of mold and ways to combat and control it.
Learned a lot! Appreciate the grounding in physics. Will come in handy. Ventilation especially priority.